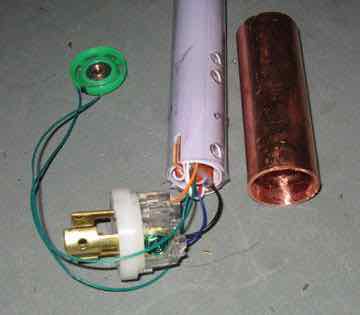
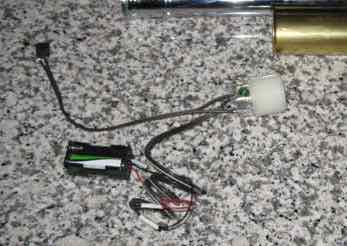
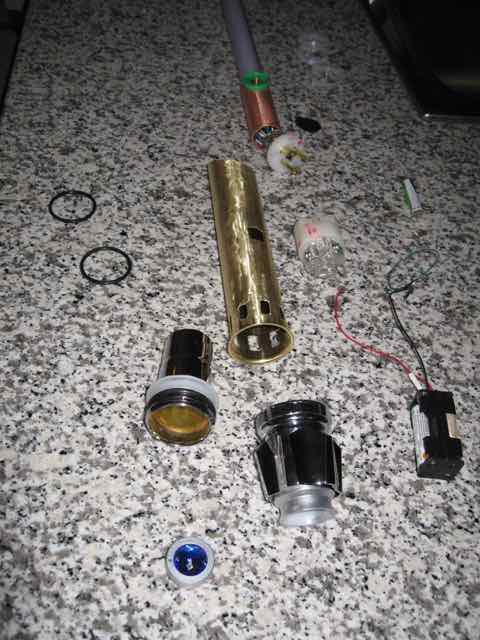
Most of the electronics and the blade come from the toy version (Ultimate FX, available at Walmart, solid blade version). The first step is taking apart the commercial version to get what you need (pop out the screws and open). The parts you'll keep are: the blade (with electronics board tucked inside & the speaker. The parts you don't need are: the switches and battery compartment - just note/photograph what each connects to before you remove them, as you're going to replace them later. To make it more compact, and run on rechargeables (lower voltage) I got a 4x AAA holder (2x2 stacking) which fits nicely the tubes I'm using for the handle and a compact switch I could glue onto the outside of the handle. The other things you need are the tubes and various bits and bobs to decorate your saber (see http://bigyellowbox.tripod.com for great tips on those). I used a brass tube with dremelled holes for decoration for the outside, but inside was a chrome one that I could screw on a faucet handle, which make a removable cover and case for the batteries to easily fit into. You also need a smaller tube to put around the bottom of the blade (to cover the board area) - I used a copper one. Lastly, you need a connector pair to bridge the gap between the handle and the blade. I used a locking (high voltage/amperage) one so I could wave it around without worrying about the blade coming loose, but you could get away with a regular 3 prong 110v one.
Now you need to make the new electronics in the handle to match what used to be there. You'll only be using a 3 prong connector (to connect switch and batteries in the handle to the blade) so check which wire is a duplicate (+ve? is the same for both the switch and the batteries). You'll also be adding the mating connector to the blade electronics, and securing it and the speaker so they're not in the way when the two pieces come together. It's best to do the work on your tubes for the handle at a similar time to help with designing that in. You also will likely need to grind down the connectors so they fit nicely inside your tubes. Once you've got the shapes you like, and tested the electronics together, glue all the respective pieces down, then test again when the glue is fully cured.

 All images copyright Rob Emery